Introduction
Students increasingly expect course materials to be available online, even for in-person classes. When you provide materials online, students can access them anytime, anywhere, and at their own pace. This helps to create a more inclusive learning environment.
A well-organized Moodle course does more than store resources and grades. It helps students understand their learning journey, manage their time, and reduce anxiety about course expectations (Nilson & Goodson, 2018, p. 40). This guide focuses on strategies for organizing and presenting your course elements to create an easy-to-navigate Moodle course for your students.
We’ll explore four key areas:
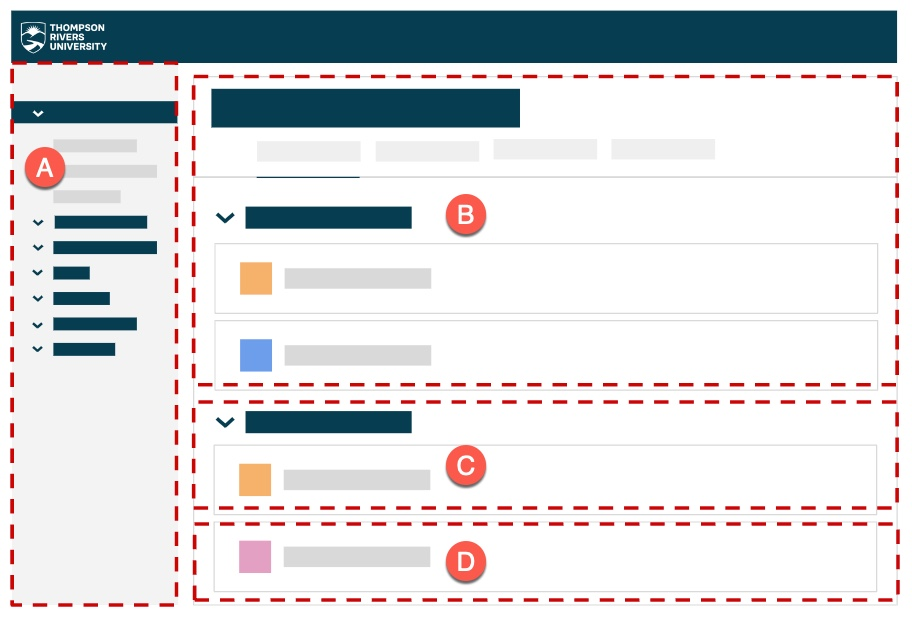
A. Course menu
B. Home page
C. Course content
D. Assessments
Course Menu
Plan Your Course Structure
Once you’ve done the hard work of planning how your learning outcomes align with your assessment and activities (constructive alignment), it is time to determine how to structure your digital course space. You can think of the course menu as the blueprint that provides students with structure and a big-picture view of what will be explored in the course.
It’s important to consider how different organizational structures can support your pedagogical goals based on the needs of your students and context. Examples of course organization structures include:
A) Sequentially
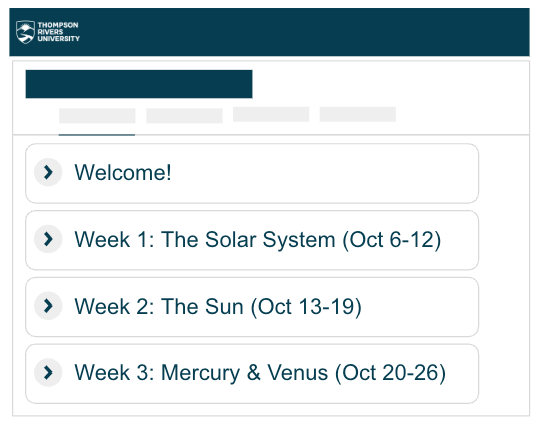
- Weeks: This illustrates a sequential, weekly progression through the course (e.g., week 1, week 2, week 3, etc.)
- Topics: This illustrates a conceptual organization of the course through the topics that will be explored (e.g., topic A, topic B, topic C, etc.)
B) Categorically
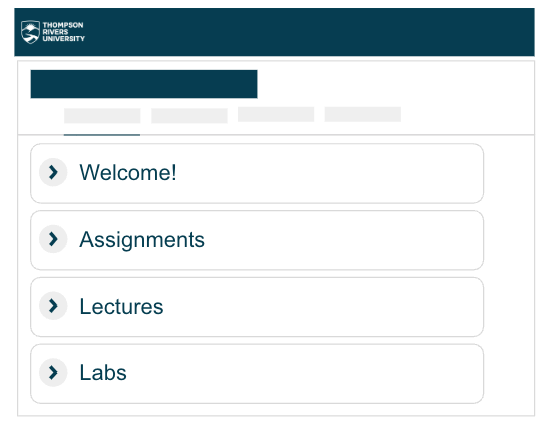
Categories: This illustrates movement through the course based on types of tasks or activities (e.g., assessments, labs, lectures, etc.)
Ask yourself
What organization structure (weeks, topics, categories) makes the most sense for my context?
Name Your Course Sections Clearly and Consistently
Once you determine the organizational structure that is most suitable for your context and course, clearly and consistently name the sections. This way, although the content changes each week, the structure stays the same which assists with navigation.
Consider including the following three elements:
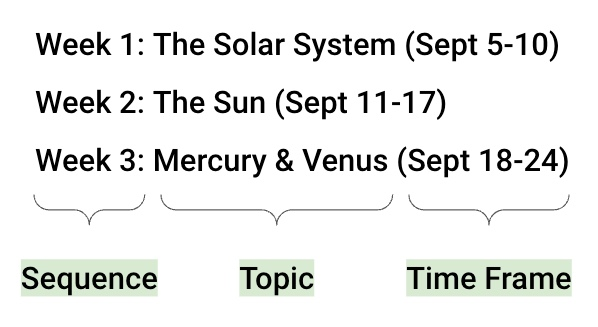
Sequence
Shows the order (e.g. Week 1, Week 2, Week 3) that content is being explored which is helpful for showing progression through the course.
Topic
Identifies what’s being covered (e.g. The Solar System) which helps students find specific content quickly.
Time frame
Shows when content is covered (e.g. Sept 5-10) which helps students plan their time. Since courses run on a term schedule, students can look at a calendar, identify where they are in the course, and plan accordingly (Nilson & Goodson, 2018, p. 40).
People recognize information more easily than they recall it from memory (Weinschenk, 2020, p. 57). Providing multiple navigation cues helps students find what they need faster.
Home Page
Your home page is the first thing students see when they enter your course, so make it welcoming and informative.
Essential Home Page Elements
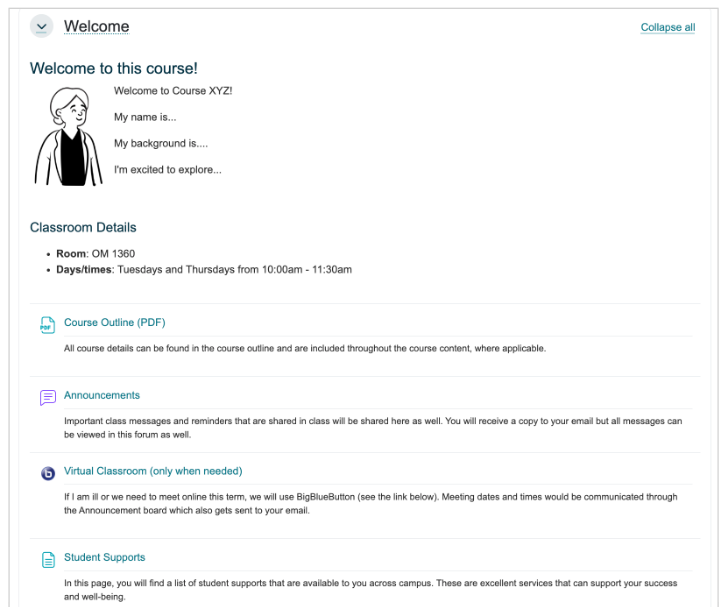
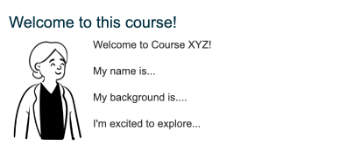
Welcome message
Greet your students and briefly introduce the course and share a bit about yourself as their instructor. You can use text, video, or another creative format.
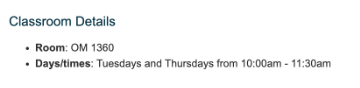
Classroom details
Adding the classroom details (location and meeting times) is helpful, especially for new students. You can always delete this later in the term.
Course outline
Make your course outline easy to find. Upload the file and add a brief description so students know what they will find in the course outline before opening it.

Class communication plan
Explain how you’ll communicate with students. For example, in Moodle, you might use the Announcements forum which sends messages to student emails and keeps a copy in Moodle. Be sure to share your virtual class communication plan with students so they know when and where they’ll receive important updates.

Virtual classroom access
Provide a link to a virtual classroom (like BigBlueButton in Moodle) from the start of classes. Include a description of how and when students might use this space (e.g. for one-on-one meetings, office hours, virtual class sessions, etc.). This will help save time if something unexpected happens and you need to meet students online.

Student support services
Share links to campus support services that can help students succeed. This might include tutoring, counseling, accessibility services, or academic advising.

All of these thoughtful and intentional details create a warm, welcoming environment for the virtual presence of your course.
Ask yourself
What other elements could you include that your students would find helpful?
Course Content
Making course materials available in your digital course space allows students to engage with them at their own pace or use assistive technologies to explore them in different formats.
Curating Your Content
Are you a curator or a dumper? A curator thoughtfully selects resources and considers their placement. A dumper adds resources without considering placement or the overall learning experience (Gonzalez, 2018).
Our brains struggle with disorganized information since our working memory has limited capacity. Organizing information efficiently for students helps optimize mental processing (Nilson & Goodson, 2018, p. 80).
What does curation look like? According to Dirksen (2016), curation could be the ability to:
- filter or identify the really interesting information to present to students
- collect and caption certain pieces of information to help students see how it all fits together
- aggregate relevant resources into a single location for easy access
- organize disparate content around a theme
- group certain elements to provide context (p. 254).

Chunk and Organize Your Content
Decide which resources students must engage with to meet learning outcomes and which are supplementary. Students learn better and remember information longer when content is chunked into categories or organized into logical groups (Nilson & Goodson, 2018, p. 81). This is further strengthened when materials are presented in the order they should review them.
Organization strategy:
- Place required resources first
- Follow with optional resources
- Clearly label optional materials as “optional” or “additional resource” so students can manage their time
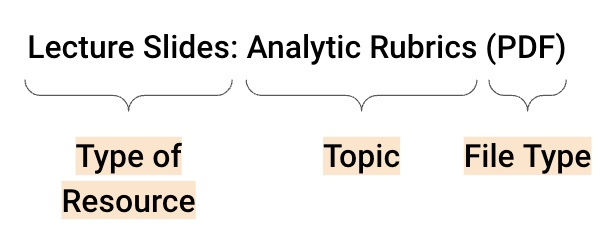
Name Resources Consistently
Inconsistent or unclear names make it hard for students to find what they need. Create clear, descriptive names that include:
Type of resource
Including the type of resource helps students understand how they will interact with it (e.g. article, video, slides, textbook chapter, etc.)
Topic or theme
Providing a bit of context helps students understand what is being covered in that resource.
File type
Knowing the file type allows students to understand how it will open on their device (e.g. PDF, Word document, web link, PowerPoint, etc.)
Examples of Naming Approaches
1. Start with resource type:
- “Slides: Analytic Rubrics (PDF)”
- “Video: CBC News Student Evaluation (4:31)”
2. Start with action words:
- “View: Analytic Rubric Slides (PDF)”
- “Watch: CBC News Student Evaluation Video (4:31)”
3. Start with topic:
- “Analytic Rubric Slides (PDF)”
- “CBC News Student Evaluation Video (4:31)”
Choose one naming approach and use it consistently. Knowing the file type helps students understand how it will open on their device. PDFs are universal and open easily across devices.
Add Context to Resources
In the classroom, you likely introduce resources before students engage with them so it’s important to do the same in your digital course space. Avoid assuming students will remember what you said in class and provide the necessary information and context students need (Weinschenk, 2020, p. 64). This benefits all students, including those who were absent, English language learners, and those who benefit from text-based guidance.
Briefly explain:
- What the resource is about
- What students should focus on
- How to interact with it
This helps students focus their attention, connect new information to what they already know, and manage their time effectively.
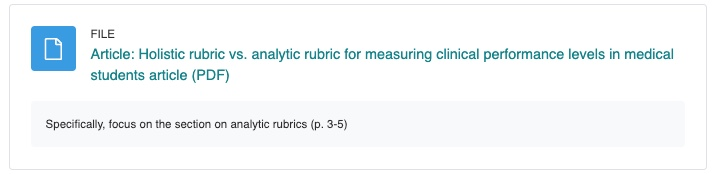
For example, the image below includes the type of resource (article), what the topic is (holistic vs. analytic rubrics), file type (PDF), and a short description of what to focus on (p. 3-5). This informative information helps students understand what to expect when they click the link to access the resource.
Assessments
Students often work on assessments outside of class. Whether assessments happen in person or online, provide clear details in your Moodle course.
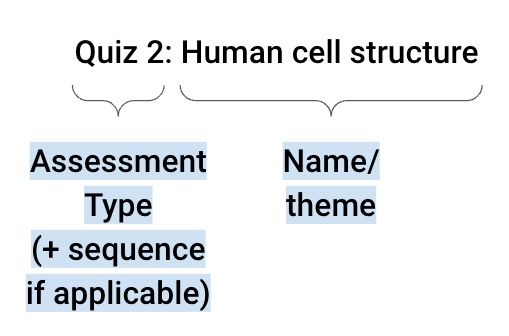
Name Assessments Clearly and Consistently
Just like for your course content, be sure to use clear, consistent names for all assessments. Include:
Assessment type
Quiz, essay, project, presentation, portfolio
Sequence (if applicable)
Quiz 1, Quiz 2, Assignment 3
Name or theme
The specific focus of the assessment (e.g. Showcase of Work, Mitochondria, Where do we belong?)
Here are examples of clear assessment names:
- “Showcase of Work (ePortfolio)”
- “Quiz 3: Mitochondria”
- “Group Presentation – Where do we belong?”
- “Assignment 1: Comparing Types of Flora (Group Project)”
Choose an assessment naming strategy and apply that consistently throughout the course.
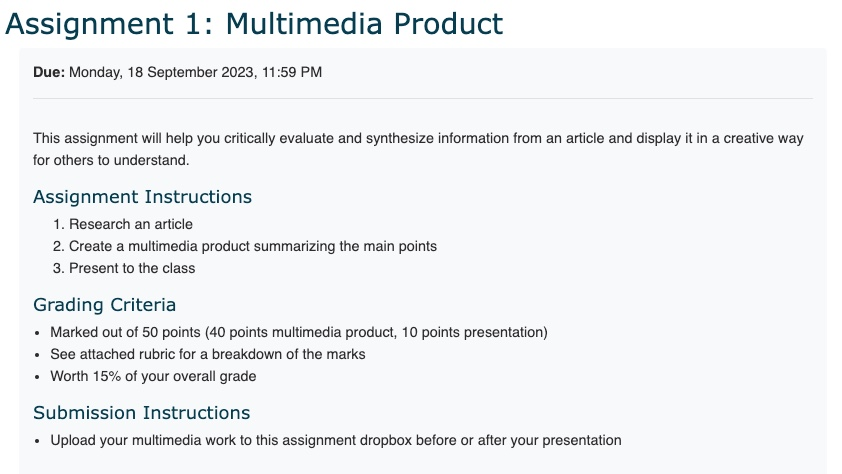
Write Clear Instructions
Make the assessment expectations explicit and specific (Nilson & Goodson, 2018, p. 144). This allows students to focus on the work rather than searching for requirements.
Key details to include:
- Purpose: How the assessment connects to learning outcomes
- Instructions: Clear steps using numbers or bullet points
- Grading details: Total marks and weight in final grade
- Marking criteria: Rubrics, checklists, or performance criteria
- Due date
- Submission instructions: How and where to submit
- For quizzes: Number and types of questions
The following image showcases how those details can be applied in assignment instructions:
Organize Assessment Locations
Provide students with clear ways to find their assessments. For example, you may organize them by:
- Week or section: Place assessments in the week they’re due. Remind students when to start working on them through class announcements or text-based reminders in earlier sections.
- Category: You might create an “Assessments” section in your course where you include the assessments.
Conclusion
Thoughtful and intentional organization transforms your digital course space into a tool that supports student success. It allows you to make course elements available online and include relevant information in a way that’s easy to navigate. This allows students to set goals, manage their time, and monitor their progress outside of the classroom (CAST, 2018). We hope this guide has you thinking about ways you can effectively and strategically organize a digital course space to optimize navigation.
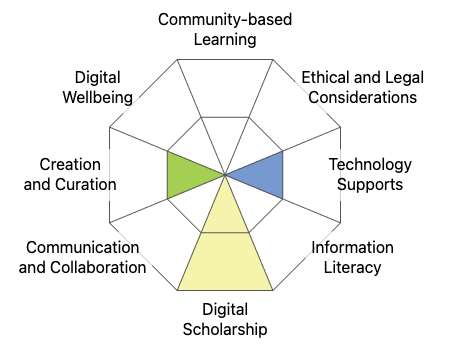
The Optimizing the Organization of a Moodle Course guide supports the B.C. Post-Secondary Digital Literacy Framework by building educators’ capacity to design clear, navigable, and pedagogically sound online learning environments. By focusing on course menus, home pages, content structure, and assessment organization, the module aligns most directly with Digital Scholarship, helping instructors use Learning Management System (LMS) tools intentionally to create accessible, supportive, and student-centred learning spaces. It also enhances Technology Supports by developing confidence and skill in selecting and configuring LMS tools, and it touches on Creation and Curation as participants learn to structure and present course content in ways that reduce cognitive load and improve the overall learning experience. Together, these competencies ensure that educators can design courses that are intuitive, inclusive, and aligned with best practices for digital learning.